Even the best-built boats need TLC over time. Whether it’s a small tear in the passenger seat or a spider crack in the gel coat, addressing them quickly can prevent these problems from spreading. Begin by purchasing a fiberglass repair kit at a marine store or online. The kit should include a polyester resin and other basic tools you’ll need to make the actual repair.
A good time to do this is while the boat is in storage for the winter or while it’s not being used. If the propeller is damaged, it should be replaced by a professional boat repair immediately.
The hull of a boat is the waterproof base that keeps it afloat. It’s made of fiberglass, with some wood or other material for strength. A hull can be damaged by collisions or dings, marine fouling or the sun’s intense heat. It can also develop cracks, blisters or delaminations, which cause a loss of integrity. It’s important to repair a hole in the hull as soon as possible because it can quickly turn into a sinking disaster.
A simple crack or scratch in a boat’s hull can be repaired with basic materials and a few steps. Start by cleaning the area and roughing up the surface with sandpaper or steel wool. Then, remove any loose sandpaper particles and tape the area. Next, mix up the resin and hardener according to the application guidelines. Apply a thick coat of the mixture to the damaged area and let it dry. A second layer can be added if needed. Once the surface is dry, sand and polish it to finish the job.
Some holes in a boat’s hull are obvious, but others seem to come out of nowhere. These progressive leaks can be difficult to track down, but there are some telltale signs. Typically, the first sign of a leak is a drop in your boat’s speed. Other common indicators include a damp patch under the seat or spongy areas of the deck.
If a fiberglass or aluminum boat’s hull sustains a dent, the best way to repair it is by using epoxy for aluminum boats. This product is available at a specialty boat store and can be purchased in different sizes depending on the size of the ding. To perform the repair, arrange the hull so that the damaged area is facing up and wear a mask and gloves. Have an assistant hold a hand anvil to pound the ding until it flattens out.
Aside from the need to clean and repair the hull, it’s also important to protect it with anti-fouling paint. This will help to keep it from getting scuffed by rocks, weeds and other debris. It’s also a good idea to polish the hull regularly with wax to prevent oxidation and tarnishing.
The deck is the area of a boat where you stand when fishing, running the engine or swinging a gaff. It can also be the area where you step in and out of the cockpit. It is important to keep the deck in good condition so that it will not allow water into the hull and cause rot.
Repairing the deck can be difficult because it is often fastened to the stringers, making access difficult. It may be necessary to cut away a section of the hull liner and cabin sole in order to gain access to the deck area. Once you have gained access, the surface will need to be cleaned thoroughly and thoroughly sanded in preparation for bonding. The sanding should be done with 80-grit paper. The sanding will help to remove any sharp “hairs” that can cut you. A degreaser or detergent should be used in areas that are contaminated with gasoline or oil, and the entire surface should be cleaned before applying a bonding agent. A good quality fiberglass adhesive such as epoxy will work.
It is a good idea to cut a new piece of core for the damaged section and dry fit it to check that the replacement will be a snug fit. It is also a good idea to wet out the contact surfaces of the new and existing core sections and apply a liberal amount of thickened epoxy/406 mixture to one side of each contact area. Then clamp the section in place and allow it to cure.
After the new deck section is cured it will need to be bedded with fiberglass putty along the stringers and bulkheads. Once the putty is hard, it can be screwed in place and filled with more fiberglass putty if needed to close any seams.
Many boats built in the decades leading up to 1990 were made with balsa core decks. The balsa is a very lightweight product, ideally suited to strengthening large and curved surfaces. Unfortunately, balsa has a tendency to rot when it is exposed to water. This rot penetrates through the deck and if left untreated will eventually cause the core to delaminate from the fiberglass skin. Repairing a soft deck with traditional adhesives such as epoxy can be expensive and time consuming. An alternative is to use Injectadeck, which is a carefully engineered structural marine foam and adhesive that will repair soft decks quickly and easily.
The interior of your boat is exposed to more elements than any other area, which can lead to cracking, fading and general wear. It’s important to keep this area in good shape for the best value and comfort from your investment. Marine upholstery can easily become worn out from sun, moisture and other weather elements, but with a little TLC this can be repaired or replaced to extend the life of your boat.
Re-upholstery can be a daunting project, and while it will certainly extend the life of your boat, it is expensive and requires you to keep the boat in dry storage during the work. Many fabricators offer hourly rates which can add up fast, and you’ll need to schedule your repairs so that you are without the boat for an extended period of time.
It’s important to find a professional that specializes in marine upholstery, as they have the proper equipment and knowledge for the work. In some cases the fabric can be patched and sewed by the boat owner using simple sewing machines, but a professional will have a machine with the ability to handle thicker fabrics and create stitches that won’t compromise the integrity of the fabric.
Often, mildew stains, flattened foam and chafe points in bimini’s and chair arms can be repaired with thoughtfully designed patches. For example, a simple piece of a matching color fabric or even a contrasting one can help cover a patch and give the cushion a more attractive appearance.
Marine upholstery is a complex work that takes time and expertise to do right. If you are not confident in your abilities, it’s always recommended to find a local expert and shadow them on a few projects before doing it yourself. Also, it’s a great idea to take pictures of the original boat upholstery before removing the old fabric so you have points of comparison.
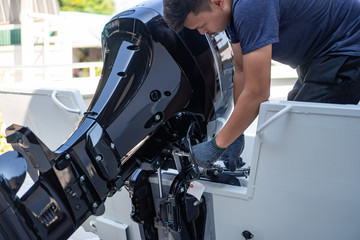
A boat’s engine is what drives it along the water, so it’s important that this system works properly. Fortunately, marine technicians can help with everything from refueling to repairing a seized engine. If you love being near the water and want to use your hands, a career as a marine technician may be right for you.
The first thing you should do when your boat’s engine fails is check to see if someone accidentally hit the kill switch or if the lanyard key has somehow come unattached from its clip. If the problem persists, a look at the fuel line should be next on your list. If the fuel line is twisted or crimped, it won’t be able to supply fuel to the engine, so it won’t start. A marine mechanic will be able to fix or replace the line, getting you back on the water.
Another common cause of a failed boat engine is the propeller. A badly damaged or mismatched propeller will create vibration, causing the boat to shake and lose speed. This is usually caused by a direct impact from something like a rock or a towrope, but it could also be the result of a loose or overly tight bolt or cotter pin. The best way to prevent this is by routinely checking the propeller for dents and other signs of wear.
A faulty alternator or battery can also prevent the engine from starting. Luckily, this is a relatively easy problem to diagnose and repair. Simply remove the black (negative) cable from the battery and then disconnect the red (positive) cable to make sure it isn’t disconnected or corroded in some way. Once you’ve done this, plug the black and red cables back into their respective terminals, start the engine, and see if it runs. If it doesn’t, the battery is probably dead and needs to be replaced.