Tips For Painting New Drywall

Painting New Drywall takes special care to get the results you want. Inspection and careful sanding are required to remove imperfections such as gouges, dings, nail holes, and dents.

Drywall

You should also apply a good-quality primer. This helps conceal drywall mud, and paint adheres better to it. Typically, it would help if you tinted the primer to match your paint color; this will save you some money on the cost of your final coats.

It’s important to properly prepare new drywall before painting so that the paint adheres and lasts for years. This involves repairing any holes or cracks, cleaning the drywall with a vacuum and a microfiber tack cloth, and sanding it smooth with a pole sander. It also involves a coat of high-quality primer made specifically for drywall. This will help the paint to go on smoothly and avoid peeling in humid conditions down the road. Finally, it’s important to sweep and mop the wall before applying the primer and to use a black cloth to make sure there isn’t any dust left behind.

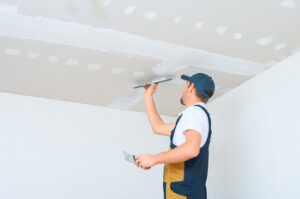
The most common cause of a flaw in a drywall surface is improperly anchored tape. This can result in blistering, peeling and cracks in the drywall. It is easy to miss these problems, especially when the lighting in the room is low and they are hard to see. The best way to find these problem areas is to hold a trouble light on the wall, moving it around to highlight each area of damage. Once you have found these issues, use a small amount of spackling or joint compound to fix them.

Another common problem is nail pops. This is caused by seasonal expansion and contraction of the studs which pushes nails out of the drywall. A bit of drywall mud or joint compound can fill in these areas, but it will take several coats to hide the holes and the rough surface.

To prevent this from happening in the future, it is recommended that you seal these dents with a caulking product. There are many different types of caulking available, but latex is the most popular. The type of caulking used will depend on the climate where you live. For example, if you are in an environment with high humidity, silicone caulking may be a better option than traditional latex.

To prevent dings and dents from showing up under the paint, it is recommended that you apply a primer. This will provide a good base for the paint and help it to hide any dings or dents in the drywall. This is especially important if you plan on using a darker color of paint. In addition, it is a good idea to apply a second coat of primer after the first.

Primer

New drywall is porous, so it must be primed before you can apply paint. This helps ensure the color stays put and doesn’t get peeled off later. It also helps reduce the number of topcoats required to achieve a professional quality finish. There are a variety of primers that are available, but you need to select the one specifically designed for your material. For example, if you are painting over new drywall, you should use a PVA (polyvinyl acetate) primer. This type of primer dries quickly, seals the pores in the surface and makes it easy to sand for a smooth surface. It is a great base coat for latex or oil-based paints.

For stained drywall, there are shellac-based primers that work well. They cover stains very well, but they don’t dry as quickly as water-based products and can have high VOC levels. If you have staining on your drywall, we recommend trying one of these on a small area of the wall before priming the entire surface.

There are also specialized primers for walls that have been previously painted, but need a second coat of primer. This is especially useful for projects in which the existing finish has flaws such as water stains or mold. The odorless version of this product is ideal if you’re sensitive to chemical or paint odors.

There are several ways to apply a primer, but spraying is the most effective and fastest way to prime a large area of new drywall. A Graco airless sprayer can be rented or purchased for a reasonable price, and will help save you time. Many professional painters spray their primer, because they can cover the entire surface more evenly than brushing or rolling. If you choose to use a sprayer, you should test your product to make sure it’s compatible with your sprayer and to determine the best application method.

Paint

When you’re ready to paint the drywall, use a high-quality latex or acrylic based paint that is specifically formulated for drywall. Drywall is very porous and will absorb other types of paints, resulting in an uneven finish.

It’s also important to use a brush that is designed for drywall. Brushes with tapered bristles are a good choice, as they will hold the paint better and produce fewer brush marks. Avoid using natural bristle brushes, as they will swell and leave behind a blotchy finish. Use synthetic-bristle brushes instead, as they’ll last longer and be more resistant to water.

Drywall is very porous and will absorb a lot of the primer that you put on it, which can make the finished product look blotchy. To avoid this, apply a coat of drywall sealer to the wall before priming and painting it. This will create a barrier that prevents the paint from soaking in, and it will also help the primer and paint adhere to the wall.

Once you’ve applied the sealer to the drywall, let it dry. Then, sand the wall smooth with a medium grit sanding sponge or hand sandpaper. Once the surface is smooth, wipe it down with a damp cloth to remove any dust and dirt.

A quality drywall primer is essential for most painting projects. It will fill the tiny holes and groves in the drywall, creating an even surface that’s ready for a coat of paint. A high-quality drywall primer will also have a higher volume of solids, which helps compensate for defects in the drywall paper, mud, and texture.

The most common type of drywall primer is a latex based product. This is ideal for new drywall, as it will provide an excellent base for the paint and will be less susceptible to cracking or peeling. Other types of drywall primers are available, such as shellac-based products, which provide an excellent stain blocking capability. However, these typically contain high levels of VOC, which means they’re not as suitable for use in homes with sensitive individuals. It is also possible to buy a paint and primer in one product that will work on new drywall, although it’s important to remember that the surface should still be primed before proceeding.

Finish

If you have recently put in new drywall, remodeled your kitchen, bathroom or bedroom, or repaired damage, it’s time to get painting. It’s not a glamorous job, but it’s one that needs to be done right to prevent issues in the future, such as peeling paint and moisture damage.

After the drywall is installed and a sander smoothed, it is a good idea to apply a thin layer of joint compound, sometimes called mud. This helps to conceal the seams and screw holes and also provides an even surface for painting. It is important to let this dry completely before beginning the actual painting process.

Next, a thorough inspection of the drywall is needed to determine what repairs are necessary. The walls should be free of gouges, dents and creases. These can be filled in with drywall mud or another paste solution and sanded with a pole sander to create an even finish on the wall. It is also a good time to fix any nail or screw holes that were left by the installer.

Once the sanding and any repair work is completed, it’s a good idea to give the entire surface a light dusting with a broom or vacuum cleaner to remove any remaining dust particles from the walls and ceiling. Keeping the walls dust-free will help to ensure that the paint will adhere properly and will stay on the wall for a long time.

A high quality primer will also help the paint to cover the drywall well and avoid showing any blemishes on the wall. A primer specifically designed for drywall will provide the best results, but any latex primer will work as well. It’s important to make sure the primer is dry before beginning the painting process.

When you are ready to begin the painting process, it’s a good idea to start in the corners of the room and work your way outwards. This will help to keep the paint from getting on any tools or furniture that might be in the way as you paint. It is also a good idea to back roll when possible, which will help to reduce streaking and drips. A seasoned pro will use a lambswool roller cover, rather than polyester, to minimize spatter and leave less lint on the surface.

How to Clean Your Windows at Home

Start by removing any curtains, blinds and other window treatments. Then use a vacuum cleaner or duster to remove heavy buildup of dust, film and smoke from windows and frames.

Window Cleaning

It’s best to clean on a cloudy day to avoid causing streaks by drying the glass too quickly. You can also use crumpled newspaper to buff your windows.Contact Window Cleaning Bradenton FL for professional help. 

A professional window cleaner uses special cloths that are lint-free so as not to leave streaks on your windows. They will also wipe the sills, frames, and tracks. In addition, they can remove stubborn deposits or stains that would be difficult to scrub off with soap, water and a sponge. These can include tar, bird droppings and mineral deposits such as calcium, lime or rust. A commercial product called CLR can help remove these stains. It is available in the cleaning section of most hardware stores.

The first step in cleaning a window is to brush the surface with a soft-bristled counter brush or a vacuum cleaner fitted with a brush attachment. This will loosen dust and dirt that can make your windows look dull. If there are cobwebs on the frame or sills, they will be removed as well.

Next, the window is sprayed with a solution of vinegar and water or a commercial glass cleaner. Then, it is wiped in a zigzag pattern, starting at the top of the window and working your way down to the bottom. When you are done, use a microfiber cloth to buff the window until it is shiny and streak-free. If there is a buildup of grime on the glass, it may take several applications of the cleaning solution to remove it.

If there are any spots or marks on the windows, they can be scrubbed with a sponge, a brush or a clean part of the microfiber cloth. If there are stains caused by hard water or mineral deposits, they can be cleaned with a commercial product that dissolves these types of deposits.

A final step is to rinse the window. This is usually done with fresh, clean water. It is important to rinse the entire window so that no soap or residue remains on the glass. Then, the squeegee is used to remove any remaining water. This will produce the smooth, sparkling results that you want on your windows.

A good rule of thumb is to clean your windows at least twice a year. But if you live in an area with severe weather, or if your windows are particularly dirty, you should clean them more often. Cleaning your windows regularly can help prolong their life and keep them looking like new.

Cleaning the Outside

It’s easy to get distracted while cleaning inside your house and overlook the outside of a window. The outside can get just as dirty and requires a similar cleaning process. However, outside windows usually require a ladder to reach them, which puts your safety at risk when you’re working on one for an extended period of time. If you’re not comfortable or confident using a ladder, then hiring a professional is the best option for getting your outside windows cleaned.

A professional window cleaner will use a bucket of water and add either vinegar or a commercial glass cleaner to it. They will then dip a mop head or a clean microfiber cloth into the solution and start wiping down the window. They will work their way across the entire surface, scrubbing it and wiping away debris with their squeegee. After they finish scrubbing the window, they will rinse it off by either spraying down the window with their hose or turning the water jets on their telescoping pole to supply fresh clean rinse water to the windows from top to bottom.

If the window is really dirty, they will scrub it with a non-abrasive scouring pad or sponge. Then they will rinse it again with the hose or their water-fed pole until the window is completely free of grease, dirt, and airborne contaminants. After the window is thoroughly rinsed, it will be wiped dry with a clean, lint-free cloth (preferably a microfiber cloth that doesn’t shed lint).

The final step in cleaning the outside of the window is to wipe down the window frame and sills. They will also wipe down the edge moldings and trim to make sure that they are completely clean. Finally, they will apply a rust inhibitor to the exterior of the window to protect it from future deterioration.

Cleaning the Frame

Window frames are an important component of the overall look and functionality of a window. However, neglecting these window components can lead to the accumulation of dirt and grime that will impact both the interior and exterior of your living spaces. The good news is that it’s easy to maintain pristine window frames with consistent and thorough cleaning. By integrating this routine into your regular home maintenance, you can avoid the buildup of dirt and grime that can cause your windows to lose their brilliance.

Whether the frame of your windows is made from wood or from an aluminum or vinyl material, these components require special care to keep them clean and looking beautiful. For wooden frames, a buildup of moisture can cause the wood to rot or warp. This is why it’s important to avoid over-saturating the window frame with water. Instead, use a cloth or towel that is only slightly damp.

On the other hand, aluminum and vinyl windows can withstand a bit more water than their wooden counterparts. To keep these materials clean, you can use a mild detergent or soap and water to wipe them down. For stubborn stains or deposits, you can also use mineral spirits or a cleaner like Pine-Sol that is safe for the material.

If your window tracks are coated with built-up grime, a strong cleanser is required. Dish soap or natural cleaners, such as vinegar, are great options. However, for particularly tough stains or deposits, you can opt to use a biological wash powder that will break down organic material.

Regardless of the cleaning product you choose, it’s important to avoid using any rough brushes or cleaners on your window frames. These can scratch or damage the glass and leave behind unsightly marks on the surface. In addition, it’s a good idea to apply automobile wax to your window frames after they are cleaned to protect them from the elements.

To make your cleaning process even easier, gather all of your materials ahead of time to avoid losing track of where you are in the process. You should have a clean bucket of warm or hot water, one towel to dip into the solution, and another dry towel to wipe away any excess water residue. Additionally, you’ll need a clean brush or toothbrush for the corners and crevices of your windows.

Cleaning the Screens

The screens of windows are often neglected, but they are a crucial element in keeping airborne dirt and pollen out of the house. The good news is, it doesn’t take a lot to clean them. You can use the same cleaning solutions as you would for windows, but be sure to get your hands on some microfiber cloths to avoid spreading dirt from one screen to another.

If you want to do a deep clean of your window screens, it’s best to remove them and lay them out to wash (HGTV recommends labeling each metal frame with marker or tape so you know which screen came from which window when you put them back in). Once you have all the windows’ screens out and ready to go, mix 1/4 cup of liquid all-purpose cleaner with 1/2 gallon of water, and get to work. Dip a sponge or microfiber cloth in the solution, and gently scrub each screen from top to bottom. When the screen is clean, rinse it with a hose set to the lowest pressure possible (to prevent stretching the screen) and let it dry completely before reinstalling it in its window.

You can also spot treat your window screens with vinegar or soapy water, while they are still in place. Just make sure the rag you’re using is lint-free and apply the cleaner in a circular motion to ensure that it’s not being rubbed over any of the frames or sills.

What Is Botox?

Best Botox San Diego is an injectable that temporarily reduces fine lines and wrinkles. It can smooth forehead and brow lines, crow’s feet near the eyes, vertical lip lines and dimpling on the chin.

Injections contain tiny doses of botulinum toxin, which block nerve signals from reaching muscles and causing them to contract. This can help soften facial wrinkles and prevent their recurrence.

Botox has become one of the most popular cosmetic treatments available. It relaxes targeted muscles that create wrinkles and gives the face a younger look. It’s also used to help treat certain medical conditions that affect the nervous and muscular systems. Botox is made up of a purified neurotoxin protein called botulinum toxin type A. It works by blocking the nerves that send signals to muscle cells to contract or shorten. The most common uses of the treatment are to reduce facial wrinkles that develop from repetitive movements like frowning and squinting. Other benefits include reducing excessive sweating and treating migraine headaches.

The injections are performed in a physician’s office or clinic by an experienced practitioner. The procedure usually takes about 20 minutes and is painless. During the procedure, your practitioner will inject Botox into the muscles responsible for your wrinkles. There are 43 muscles in the face, and your practitioner will be able to pinpoint the exact ones that need treatment. You may require multiple injections for effective results.

A few days after the injections, you will start to see the effects. The wrinkles and fine lines will soften and will continue to fade for 3 to 6 months. The treatment will need to be repeated every few months for best results.

There are other treatments that can be combined with the injections to maximize their effectiveness. These treatments can include dermal fillers and facial muscles exercises. It’s important to find an experienced practitioner who will customize the treatment to meet your needs and goals.

Botox has many medical uses and is approved by the FDA for several medical conditions that affect the nervous and muscular systems. It’s been found to relieve the symptoms of more than 20 different medical conditions. It’s also a good treatment option for people who have chronic migraines or urinary incontinence. However, it is not recommended for pregnant women or breastfeeding mothers. It’s also important to talk to your doctor about the risks and benefits of Botox if you have immunosuppressive diseases or other health issues.

To get Botox injections, you will need to schedule an appointment with a qualified healthcare professional. Your provider will assess your face and determine the best treatment options for you. It is important to choose a practitioner with extensive training in the use of Botox. This will help ensure that you are receiving safe and effective treatment.

During the procedure, your provider will inject Botulinum toxin type A into specific muscles in your face with a fine needle. They may ask you to move your muscles or flex your face in certain ways to help find the right locations for the injections. This process usually takes about 10 minutes. Several injections may be needed, depending on the area being treated. For example, you might need three injections in the outer corner of each eye to smooth crow’s feet.

After the injections, you can return to your normal daily activities. However, it is important to avoid rubbing or massaging the treated areas for 12 hours. Your provider may also recommend using an ice pack to help reduce swelling and bruising. Most people find that Botox injections begin to work within one to three days, but it can take up to a week for the full results to appear.

You will likely need to have regular treatments every three to six months to maintain your results. It is important to choose a practitioner that you trust, and that you speak openly with your healthcare professional about your goals for your face. It is important that your doctor understands that your face is unique and reflects who you are. Your dermatologist should be able to tell you whether or not Botox is right for you by looking at your facial structure and assessing your habits, such as how frequently you purse your lips or frown.

It is a good idea to seek treatment before your wrinkles become too deep or permanent. Some experts suggest seeking preventative treatment in your mid-20s, if you have an especially expressive face or have family members who developed these wrinkles at a younger age.

Botox injections use tiny amounts of a protein made from the bacteria Clostridium botulinum. This botulinum toxin temporarily paralyzes muscle and has many medical uses, including treatment of eyelid spasms and some types of migraine headaches. It also has cosmetic applications, such as reducing wrinkles and other facial lines.

Your health care provider may numb your skin before the procedure by applying anesthetic cream or gel, ice or using vibration anesthesia (a type of massage that uses a vibrating hand piece). Injections are typically done in a doctor’s office or clinic.

The procedure is quick, painless and generally safe. You may feel slight pressure as the needle goes in, but this is normal. Your health care provider will use a fine needle and inject small amounts of Botulinum toxin into your skin or muscles, according to the American Osteopathic College of Dermatology. He or she will use a handheld mirror to help guide you to ensure proper placement.

Side effects from Botox usually are mild and last a few days or weeks. The most common are bruising and swelling near the injection site. These happen because blood vessels in the area were briefly injured by the needle. It is important to keep your skin moisturized after treatment, as this helps reduce bruising and swelling.

In some cases, the medicine can migrate from the injection site and affect other muscles in the body. This is more likely if you have taken a certain medication or used an antibiotic within the past four months. It is important to tell your doctor if you are taking these medications or any other drugs.

Some people have trouble swallowing after the injections, especially if the medicine spreads to the muscles that help with swallowing. If this occurs, it is recommended that you drink plenty of water and do not attempt to force yourself to eat or swallow. This should pass in a few days.

Avoid rubbing or massaging the treated area. This can cause the toxins to dislodge and move to areas where they aren’t needed. In addition, don’t lie down for 12 hours after getting the injections or participate in a vigorous exercise routine for three to four hours afterward.

The results of botox usually take effect within two to four days after the treatment. It takes this time for the drug to reach the cellular level and inhibit the release of neurotransmitters, resulting in the muscle’s paralysis. This is why it’s important to consult with a licensed practitioner. Certain medical conditions or medications can also impact the length of time it takes for botox to work, especially antibiotics like Levaquin, Cipro, and Clindamycin.

Once the effects of botox wear off, the muscles return to their normal activity and the wrinkles reappear. This is why it’s important to maintain a regular schedule of treatments to ensure long-term results. Many patients opt to have follow-up injections every four to six months, but this can vary depending on the desired outcome and the severity of the wrinkles.

In addition to reducing the appearance of fine lines and wrinkles, Botox can be used to treat a number of other health issues. It is FDA approved to reduce excessive sweating, and it can also help with chronic migraines. It does this by blocking nerve signals to the sweat glands and preventing the activation of pain networks in the brain.

Botox has also been shown to improve the appearance of enlarged pores, uneven skin texture, and microroughness. It can even decrease the appearance of freckles and dark spots. This is why it’s so popular among people of all ages. It helps them feel more confident and younger-looking.

Although botox is a very safe treatment, it’s important to choose a reputable clinic and to avoid self-injection. Using unlicensed products can lead to side effects such as botulism, which is dangerous and can cause permanent damage. You should also avoid hosting a “Botox Party” at your home or hotel, as this can lead to serious complications.

If you’re interested in learning more about the benefits of botox, contact us today! Our experienced team will be happy to answer any questions and address any concerns you may have. We look forward to helping you get the youthful, smooth appearance you desire!

Why Hire a Personal Trainer?

Whether getting a ‘bikini body’ for summer or improving core strength, personal trainers can help you set realistic goals and keep you on track to achieve them. They can also educate you about nutrition, what exercises target which muscles, and more. Contact Personal Trainer NJ now!

Choosing a qualified and experienced trainer is crucial. Look for credentials such as a bachelor’s degree in exercise science or a similar field and a National Commission for Certifying Agencies-accredited certification.

  1. They can help you set realistic goals.

Many people who hire Personal Trainers are looking to get into better shape. However, the road to fitness is long, and it can be easy for them to become discouraged if their goals are unrealistic. A good trainer will listen carefully to their clients and help them set realistic, short-term goals within a reasonable timeframe. For example, a goal to sign three new clients in the next month is much more specific and attainable than simply ” getting into better shape.”

Once clients have established their objectives, a trainer assesses their fitness level. This can include measurements, body composition analysis, and strength tests. They can then use this information to create a program to ensure the client is training safely and effectively. The trainer can also break down larger, longer-term goals into shorter, more manageable milestones that will act as stepping stones toward the ultimate goal.

Personal Trainers have vast knowledge about exercise, nutrition, and health. They can provide detailed, educated, and personalized answers to their clients’ questions. They can help their clients understand how diet plays a role in their fitness journey, the correct technique for certain exercises, and even how to incorporate various workouts into their routine. This allows their clients to feel greater confidence and control over their fitness goals. This, in turn, helps them maintain their motivation and stick to their plans even on days when they don’t feel like working out. (1). .

  1. They can help you work out the right way.

A good personal trainer will ensure you are working out most effectively. They will help you improve your form, reducing the risk of injury. They will also give you tips and advice on how to get the most out of your workouts.

A personal trainer should be able to assess the needs of each client and design exercise programs that are appropriate for their abilities. This may include strength training, cardiovascular exercises, flexibility, and nutrition advice.

In addition to this, a good trainer should be knowledgeable about fitness equipment and how to use it. They should also be able to teach clients proper technique and posture for each exercise, increasing their effectiveness. They should also be able to modify exercises for those with special needs, such as injuries or physical limitations.

Lastly, a good trainer should be able to motivate their clients and keep them motivated to stick with their workout routines. This is especially important for those struggling with motivation or prone to slacking off.

Personal trainers with college degrees in subjects like kinesiology, sports science, and nutrition are likelier to help their clients reach their fitness goals. They should also be certified in CPR and first aid and have liability insurance. It is also good to ask if the trainer has professional experience.

Some trainers specialize in particular types of exercises, such as boxing. For example, Rob Piela of Gotham G-Box trains some of the most famous athletes in New York, including Hugh Jackman and Bradley Cooper. Other trainers focus on specific populations, such as children or overly competitive people.

  1. They can motivate you.

Having a personal trainer means you have someone to hold you accountable. A good personal trainer can make exercise fun and exciting, encouraging you to work out hard. They’ll also be able to motivate you when you’re struggling and help you overcome challenges.

A quality trainer should have a deep knowledge of fitness and health principles that can be applied to your goals. For example, they should be able to explain the benefits of a balanced diet and how it can affect your workouts. They should also understand exercise science well, including anatomy, physiology, and biomechanics. This will allow them to create safe and effective workouts for you.

The most important factor in sticking to a workout routine is enjoying it. A qualified trainer can make the workouts interesting, challenging, and varied, so you’ll keep returning for more. They’ll also be able to encourage you to push yourself during the exercises and cheer you on when you’re trying your hardest.

If you’re looking for a Personal Trainer, take the time to do some research. Look for a trainer certified through a reputable organization, such as ACSM, ACE, or IDEA, and with a lot of experience working with clients with similar goals to yours. You’ll also want to consider location, schedule flexibility, and cost factors. Once you’ve found a trainer that seems right for you, don’t hesitate to ask them for references or testimonials from previous clients! They’ll happily share their experiences and help you decide whether they fit you well.

  1. They can help you stay on track.

Personal trainers are responsible for helping their clients set measurable goals and creating a plan to reach those goals. They can also help keep you accountable by encouraging and motivating you to attend your workouts and follow their advice. A good personal trainer will also deeply understand exercise science, nutrition, and human physiology. They may also have a degree in kinesiology, sports science, or a related field.

Many Personal Trainers provide ongoing support and accountability to their customers outside the gym. They may coach clients on better managing stress, making healthy food choices, and creating other habits that contribute to long-term success. In addition, they often have a deep knowledge of how to properly use equipment, design effective workouts, and stay on top of current research and trends in the fitness industry.

A Personal Trainer can also help you see real results by routinely monitoring your progress and adjusting as needed. They can use various methods to measure progress, such as body measurements and fitness evaluations. This regular feedback helps keep clients motivated and provides them with an objective sense of achievement, which can be a powerful incentive to continue working hard.

Before hiring a personal trainer, ask about their background and experience. Look for someone with a proven track record of helping their clients achieve their fitness goals and understanding how to motivate and inspire others. When selecting a Personal Trainer, you should also consider location, scheduling flexibility, and cost. Additionally, be sure to ask about their certifications and if they have any Continuing Education Units (CEUs) that need to be renewed.

  1. They can help you avoid injuries.

Getting injured in the gym can be a major setback. A personal trainer can help you avoid injury by teaching you proper technique and providing feedback on your form.

They will also help you find the right exercise intensity and frequency for your goals while considering any current injuries or limitations. This will reduce your risk of injury and speed up recovery if you do get injured.

Often, fitness-related injuries are the result of overtraining. Trainers can help you find the right balance between strength training and cardio to prevent injuries and achieve your desired results. They will also monitor your progress and adjust as needed to keep you on track.

In addition to ensuring you are using the right equipment and techniques, Personal Trainers can also teach you how to improve your posture, correct your alignment, and move in a more controlled manner. This will reduce your risk of injuries by preventing you from placing undue stress on your muscles, joints, and tendons.

Whether you are a beginner or an experienced exerciser, hiring a Personal Trainer can be a great way to boost your workout motivation and keep you on track to meet your goals. However, choosing a qualified Trainer with the proper certifications and education is important. Look for a Personal Trainer with a college degree in subjects like Kinesiology or Sports Science and first aid and CPR-AED certification. Also, check if they have liability insurance in case of an accident or injury while working with you. By following these tips, you can be confident that your trainer will provide you with the best fitness experience.